파라미터 연결 후 요청 처리하기
✒️ 2025-06-24 00:15 내용 수정
- Spring의 파라미터 연결하기도 비슷한 내용이므로 참고.
사용하는 Annotation
1. @RequestParam
- 요청 파라미터를 Key와 Value 형태로 매개변수에 사용한다.
- URL에 요청 파라미터가 포함되어 있거나 form 데이터를 가져올 때 사용 가능하다.
- 다만 form 데이터는 객체로 묶는 경우
@ModelAttribute가 더 적절하다.
- 다만 form 데이터는 객체로 묶는 경우
@RequestParam("가져올데이터이름") 데이터타입 변수명으로 작성하며,@RequestParam 데이터타입 변수명으로 생략 가능하다.
public String test(
	@RequestParam(name="name", required=true, defaultValue="0") dataType name
)
| 옵션 | 값 | 설명 |
|---|---|---|
name |
이름 | 가져올 파라미터의 이름 |
required |
true/false | 파라미터 필수 여부. true라면 반드시 값이 넘어와야 하며, 값이 넘어오지 않으면 400 error 발생 |
defaultValue |
기본값 | 넘어온 값이 없을 때 기본값 설정 |
- Controller 패키지를 생성하고
SearchController를 생성한다.
@Controller
public class SearchController {
    @GetMapping("/search")
    public String search(@RequestParam String keyword, Model model) {
        model.addAttribute("searchKeyword", keyword);
        model.addAttribute("message", keyword+"에 대한 검색 결과입니다.");
        return "searchResult";
    }
}
src/main/resources/templates에searchResult.html을 생성한다.- MVC 디자인 패턴 만들기에서 Thymeleaf 설정을 참고.
<!doctype html>
<html lang="ko" xmlns:th="http://www.thymeleaf.org">
<head>
    <title>Search Result</title>
</head>
<body>
    <h1 th:text="${message}"></h1>
    <p th:text="${searchKeyword}"></p>
</body>
</html>
- web 브라우저에서
http://localhost:8080/search?keyword=파라미터 연결하기로 입력하면 화면에도 검색 키워드가 뜬다.

2. @PathVariable
- 요청에서 Path Variable을 가져올 때 사용한다.
/users/1,/category/30등에서 숫자 부분과 같이 path의 일부를 가져올 수 있다.- 리소스 경로 참고.
- Path 정보이므로 Path Variable이 누락될 경우 에러가 발생한다.
@GetMapping("/users/{id}")
public String test(@PathVariable Long id) {}
- 새 Controller
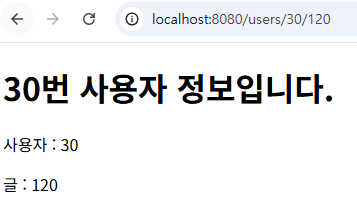
UserController를 만들고,@GetMapping에서 endpoint를 다음과 같이 지정한다./users/{id}/{postId}: 사용자의 id와 게시글 번호를 path variable로 설정한다.
// controller
@Controller
public class UserController {
    @GetMapping("/users/{id}/{postId}")
    public String user(
		@PathVariable String id,
		@PathVariable Long postId,
		Model model)
    {
        model.addAttribute("userId", id);
        model.addAttribute("postId", postId);
        model.addAttribute("message", id+"번 사용자 정보입니다.");
        return "userInfo";
    }
}
<!doctype html>
<html lang="ko" xmlns:th="http://www.thymeleaf.org">
<head>
    <title>User Info</title>
</head>
<body>
    <h1 th:text="${message}"></h1>
    <p th:text="'사용자 : ' + ${userId}"></p>
    <p th:text="'글 : ' + ${postId}"></p>
</body>
</html>
3. @ModelAttribute
- Controller의 매개변수를 객체 형태(참조형)로 받을 때 때 사용한다.
- DTO 클래스를 미리 생성한 후
@ModelAttribute로 요청 파라미터 값을 받을 때 DTO 내의 필드 이름과 파라미터 이름이 일치하면 자동으로 mapping된다.
- DTO 클래스를 미리 생성한 후
@ModelAttribute("name") 데이터타입 이름으로 작성하며@ModelAttribute 데이터타입 이름으로 생략 가능하다.- 노출을 원하지 않는 정보까지 공개될 수 있기 때문에 사용 시 주의해야 한다.
- 참고 자료 : Spring ModelAttribute
- Argument가 기본 데이터 타입이 아니거나 다른 Argument resolver에 의해 처리되는 것이 아닌 경우라면
@ModelAttribute가 적용되는 것으로 처리된다.
public String test(@ModelAttribute("dto") PersonDTO dto) {}
public @ModelAttribute("name") int test() {}
- 회원 가입용
RegisterController를 생성하고, 회원 가입 화면을 GET으로 보내줄@GetMapping과 회원 가입 처리를 진행하는 POST 동작인@PostMappingendpoint를 각각 지정한다.- 요청에 따라 자동으로 GET과 POST 동작을 찾아 실행된다.
// controller
@Controller
public class RegisterController {
    @GetMapping("/register")
    public String registerForm() {
        return "userForm";
    }

    @PostMapping("/register")
    public String registerUser(@ModelAttribute User user, Model model) {
        model.addAttribute("user", user);
        model.addAttribute("message", "성공적으로 가입되었습니다.");
        return "registerSuccess";
    }
}
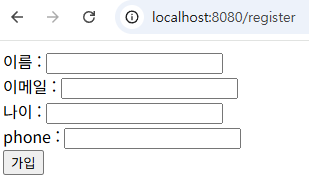
src/main/resources/templates에userForm.html에선 데이터를 입력하여form을 전송한다.action에서 Controller의 POST endpoint인/register를 입력하면form제출 시 POST 동작이 자동으로 Mapping된다.
<!doctype html>
<html lang="ko" xmlns:th="http://www.thymeleaf.org">
<head>
    <title>Register Form</title>
</head>
<body>
    <form action="/register" method="post">
        <div>이름 : <input type="text" name="name"></div>
        <div>이메일 : <input type="email" name="email"></div>
        <div>나이 : <input type="number" name="age"></div>
        <div>phone : <input type="text" name="phone"></div>
        <button type="submit">가입</button>
    </form>
</body>
</html>
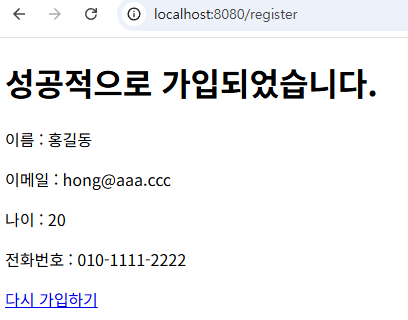
src/main/resources/templates에registerSuccess.html을 생성하고, Controller에서 보낸Model객체를 통해 데이터를 출력한다.
<!doctype html>
<html lang="ko" xmlns:th="http://www.thymeleaf.org">
<head>
    <title>Register Success</title>
</head>
<body>
    <h1 th:text="${message}"></h1>
    <div th:object="${user}">
        <p th:text="'이름 : ' + *{name}"></p>
        <p th:text="'이메일 : ' + *{email}"></p>
        <p th:text="'나이 : ' + *{age}"></p>
        <p th:text="'전화번호 : ' + *{phone}"></p>
    </div>
    <a th:href="@{/register}">다시 가입하기</a>
</body>
</html>